>> Return to Purchase AV202-B
Hinweis - Mac hat jetzt M1 & Intel Architektur-Modell. Macs mit Apple-Silizium, wie das M1 MacBook Pro, können sowohl iOS-Apps als auch Mac-Apps ausführen, aber sie können auch x86-64-Software ausführen, die dank einer so genannten Rosetta 2 für die Intel-Architektur entwickelt wurde.
QuickTime Player – Benutzerhandbuch
- Wählen Sie "Ablage" > "Neue Audio-Aufnahme".
- cken Sie zum Ändern der Aufnahme-Einstellungen auf den Pfeil neben der Aufnahmetaste. Wählen Sie anschließend Ihr Mikrofon und die Aufnahmequalität aus.
- Verwenden Sie den Lautstärke-Schieberegler, um den Ton während der Aufnahme zu steuern.
- Klicken Sie auf die Aufnahmetaste
 , um die Aufnahme zu starten. Klicken Sie erneut darauf, um die Aufnahme anzuhalten.
Step 1 - Hardware checking on your macOS
Notice - To use Audacity on your macOS, always to make sure the USB-Audio-Grabber is plugged on your mac's USB port, and Audacity software is not open.
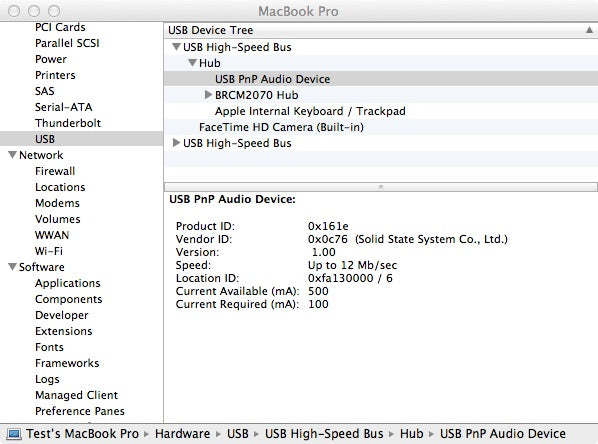
Step 2 -Open Audacity & make necessary Settings.
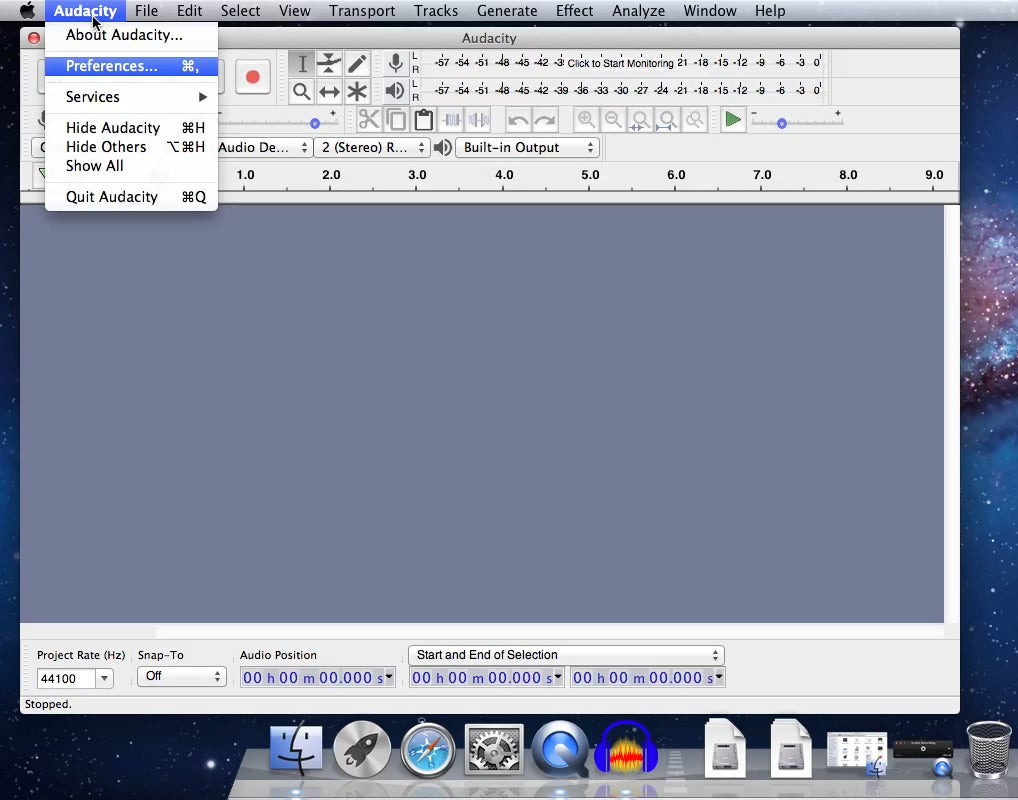
Make sure your hardware is fine, then we need to configurate the Audacity before using it recording audio. Click "Audacity" ---> "Preference"
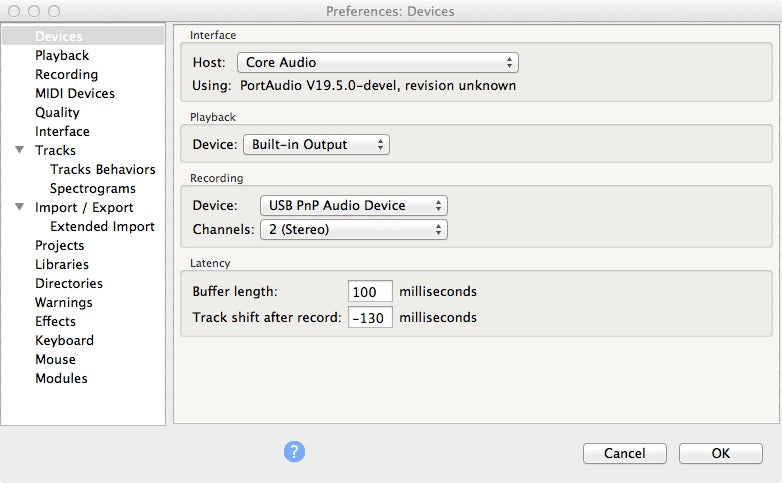
2 - 1 Devices settings
Select "Devices" and make proper settings for "Playback" & "Recording / Device:". Here USB PnP Audio Device is the correct setting.
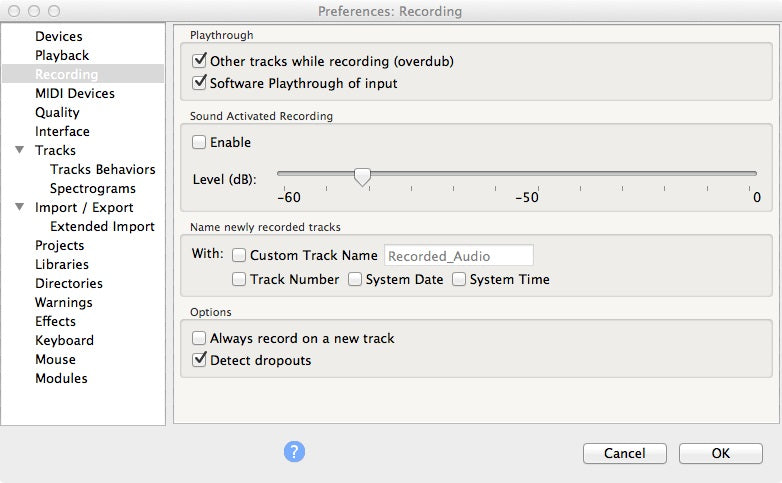
2 -2 Recording settings
At Recording please do choose "Software Playthrough of input", otherwise you can not hear the audio while recording.
3 - Start Recording
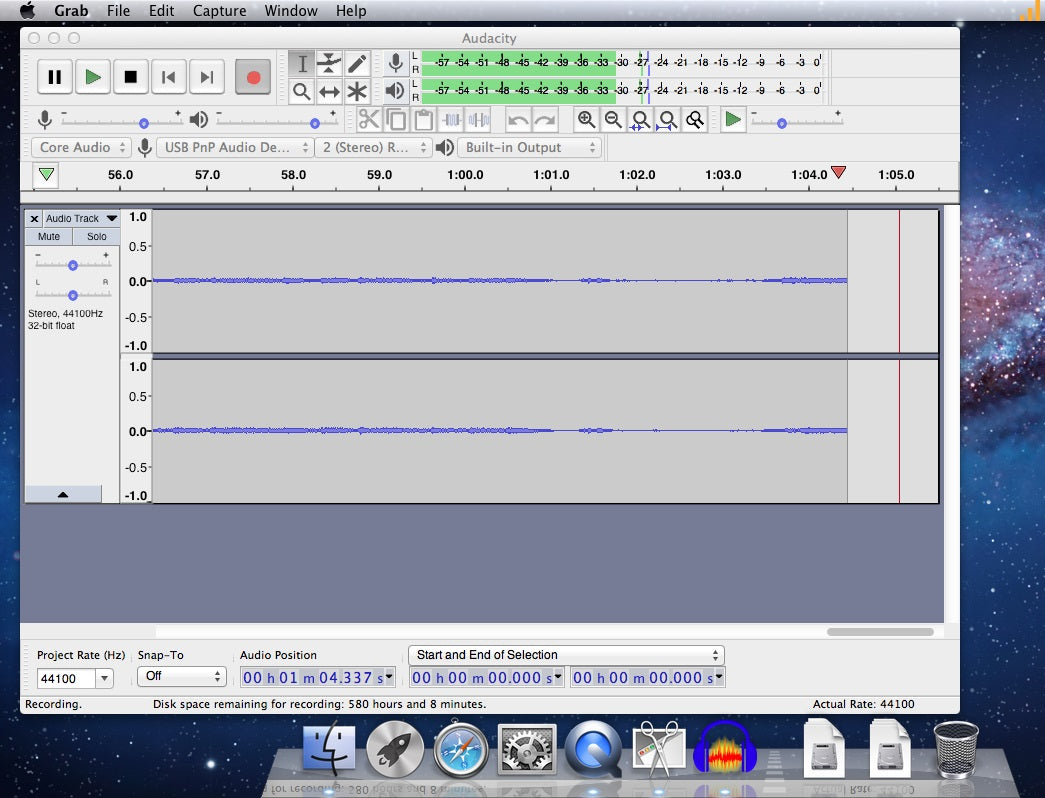
After the correct settings, you can find MIC Source, Stereo Recording, Built-in Output are well selected.

Now we just click the Red Record button ( ![]() )to start audio recording.
)to start audio recording.
Reording by QuickTime Player
QuickTime Player.supports Audio Recording as well.
- Choose File > New Audio Recording.
- To change the recording settings, click the arrow next to the Record button. Then choose your microphone and recording quality.
- To monitor audio while it's being recorded, use the volume slider.
- Click the Record button
 to start recording. Click it again to stop recording.
